
I must confess that I am the mom who says “no” to white bread from the store. My mom told me “no,” and I have passed this down to my children. I actually am probably even more particular because I require that the bread be whole grain wheat bread. So it was somewhat shocking to my children that I made a sandwich bread that wasn’t wheat. To be honest, I have not had much luck in the past with sandwich style breads. They just didn’t live up to my standards.
Last week, while at the library to start our summer reading, I grabbed a Sur la Table baking cookbook (The Art and Soul of Baking). I have spent lots of time reading the recipes, and have even had success with several. I knew after making croissants from scratch that I could try sandwich bread once again. I had decided several months ago that I wanted to invest in a new loaf pan. I have ceramic ones, and I was convinced this was part of my problem with my bread baking. So after a bit of research, I decided to fork over a pretty penny for Williams-Sonoma’s gold touch loaf pan (Mine is the 1.5 pound pan). With my new tool in hand, I was ready to try my hand at sandwich bread once again.
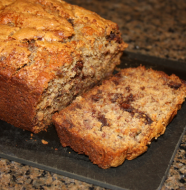
William has been going to swim team practice at 7:30 in the mornings so I thought I would go ahead and start my bread and that way it would be finished by lunchtime. It fit well into my morning, and then I had homemade bread ready for the evening meal and still spent the afternoon at the pool. While I knew my bread looked delicious before heading to the pool, I didn’t try it until we got home. It was simply scrumptious. I was so excited! It even slices well so that you can use it for sandwiches. I have found success finally! I am now looking forward to many more varieties and will be sure to add wheat to my repertoire in the near future. While I know bread baking is not for everyone, it is something I truly enjoy and always feel is totally worth the effort.

Old-Fashioned White Bread
Printer Friendly Recipe
Ingredients:
1/4 cup warm water (110-115 degrees)
1 teaspoon sugar
1 tablespoon active dry yeast (or 2 1/4 teaspoons instant yeast)
1 cup warm whole milk (110-115 degrees)
2 tablespoons unsalted butter, melted
3 cups bread flour
1 1/2 teaspoons salt
Directions:
Place the water, sugar, and yeast in a small bowl and whisk to combine. Allow the mixture to sit for 10 minutes, or until the yeast is activated and foamy. In a two-cup measuring cup whisk the warm milk together with the melted butter.
Place the flour and salt in the bowl of a stand mixer. Mix for 1 minute on medium speed to combine. Add the yeast mixture and milk to the flour and mix on medium speed until the dough comes together, 2-3 minutes. Cover the bowl with plastic wrap and let the dough rest for 20 minutes. (This allows the flour to fully absorb the liquids.) After the rest, turn the mixer to medium-low and knead the dough until it is elastic and smooth, 3-6 minutes.
Lightly spray a large bowl with cooking spray to coat the bowl. Scrape the dough into the prepared bowl, turning the dough to coat the top of the dough. Cover the bowl with plastic wrap and let it rise until doubled, 45-60 minutes.
Turn out the dough onto a lightly flour surface. Press down on the dough to expel some of the air bubbles but do not knead the dough. Shape the dough. Lightly coat a 1 1/2 pound loaf pan with butter. Place the dough, seam side down in the pan.
*To shape a rectangular loaf, press the dough into a flattened rectangle whose long sides are a couple of inches shorter than the long sides of the bread pan. Arrange the dough so a long side is parallel to the edge of your work surface. Fold the long side opposite you up into the center of the rectangle. Fold the long side opposite you up into the center of the rectangle. Fold the long side nearest you into the center, Use the heel of your hand to press the two edges together. Turn the dough 90 degrees. Roll the short side opposite you toward the center, and with each roll press your thumbs into the crease to seal it and to create tension on the outside of the dough. When you reach the bottom edge closest to you, use your fingers to pinch the final seam closed. The dough should be the same length as your baking pan. It if is short, gently roll it back and forth, pressing slightly to elongate the dough. If it is long, squeeze the dough together slightly to shorten it, and tuck the ends, under if necessary. Always place the dough in the pan seam side down.
Lightly oil the top of the dough to keep it moist. Cover the pan loosely with plastic wrap and allow the dough to rise again for 45-60 minutes.
Preheat the oven to 400 degrees and position a rack in the center of the oven. Bake for 35-40 minutes. The bread should be golden brown and the internal temperature registers 200 degrees on an instant-read thermometer. Transfer to a rack and cool completely.


looks delicious. I love to smell fresh baked bread/rolls. Meme used to make delicious rolls and we always had to eat one warm with butter and honey.
Thanks Aunt Alice! I am sure the rolls were yummy. I remember Nana making some kind of roll on Sundays after church that were delicious. I have no idea what the recipe was but they were yummy.